Salesforce Classic: Multi Hub CRM Setup
Please note that this is an additional setup if you are enabling Multi Hub CRM integration. The following initial setup will need to be done first before continuing to this setup. You will only do this initial setup once, but connect each and every Hub's Salesforce integration. Salesforce Integration Setup Overview
This article will cover the following topics:
Modify Salesforce Layout
Add Influitive Hub Mappings
After you’ve added the AppExchange version 3.0, please add the new InfluitiveHub Mappings menu in your Salesforce Navigation menu:
- Once logged into Salesforce, click on your Profile Name > My Settings > Display & Layout > Customize My Tabs
- Add Hub Mappings > Save


Add AdvocateHubs to the Influitive Hub Mapping
- Once the menu is added, open the Influitive Hub Mapping from the Navigation tab
- Click on the New button to add the AdvocateHubs information:

- Enter your Influitive Hub's Program Name.

- For Hub ID, this information is available in your AdvocateHub. Sign in to your admin account in the Hub > Click on the gear icon > Integration > Influtive API > Manage > Click the Setup tab > Copy the X_ORG_ID.

- Paste in on the Hub ID field and Save.
- Repeat these steps for the other AdvocateHub you are connecting.


Add Influitive Hub details component
- In your Salesforce, click Setup > Customize > Contacts > Page Layout > Select the Layout that your users use.


- Remove the Fields for Date Joined AdvocateHub and Date Added To AdvocateHub, since the two fields will be replaced with Influitive Hub Details (Step 4) for MultiHub CRM functions:
 To remove it, select the Remove icon next to the fields.
- Select the Related List > Influitive Hub Details > Drag and Drop it to the layout > Click Save.

- Once added, click on the wrench icon next to the Influitive Hub Details.
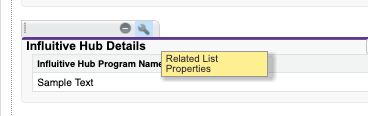
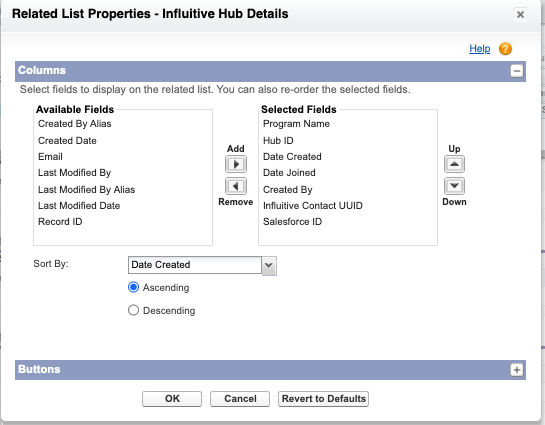
- Add the following fields into the Selected Fields column. You can sort this event logs by Date Created. These are the fields that will be displayed on the Hub Details. Click OK and Save your layout.


 To remove it, select the Remove icon next to the fields.


Please note that this does not work retroactively. If you would like to populate the Influitive Hub Details component retroactively, please contact support@influitive.com
Authenticate Salesforce Integration in each of your Hubs
After the AppExchange package is installed and the layout is customized, a Salesforce user (preferably an administrator) would need to input their Salesforce username, password, and security token into all of the AdvocateHub in the MultiHub family to connect to the Salesforce instance.
Please note that you will need to do this step for each Hub that you're connecting to one Salesforce instance.
- In the AdvocateHub, click on the Gear icon in the top right corner of the screen and click on Integrations to go to the integration library.

- Browse through the integration library until you find the Salesforce integration and click Manage.

- To enter your credentials, navigate to the Setup Tab and click Authenticate to start and you will see the following page:

- Choose the Target Environment for the Salesforce instance you're connecting, either Production or Sandbox instance. It is currently not possible to connect to both instances at the same time. However, you may switch the instance and re-authenticate at any time.
- Next, enter the Username, Password, Token and Organization ID associated with your Salesforce account. Please make sure the Organization ID is correct and that the connected integration user has the following Salesforce: Required Field Permissions:
- How to find your Token: Go to My Settings on Salesforce under your Admin name > Under the Personal option > Reset My Security Token > Click on the Reset Security Token button. You will be sent an email to your inbox containing the token.


- How to find your Organization ID: To find Organization ID, go to Salesforce Setup > In the Quick Find Search, type Company Information.

- How to connect without a token:
- Login to Salesforce and go to Setup > Security > Network Access.
- Add Influitive’s IP address (contact support@influitive.com to acquire the IP address) to the list of trusted IP addresses. It can be both the start and the end of the range.
- Return to the Salesforce integration in the AdvocateHub and enter your credentials (without the token).
- You may get an error message the first time you save your credentials in the hub as our system is still communicating with SFDC to figure out the connection. If so, please try again and give it a few minutes to authenticate.
- How to find your Token: Go to My Settings on Salesforce under your Admin name > Under the Personal option > Reset My Security Token > Click on the Reset Security Token button. You will be sent an email to your inbox containing the token.
- Under App Exchange Version, please select version 3.0. Once all the data is confirmed, please hit Save to authenticate the integration.
- If you run into any issues or received any error messages, please consult our Salesforce Errors and Troubleshooting documentation. If you can't find the answer to the issue, please take a screenshot of any error messages you've received and send an email to support@influitive.com.


Set Automatic Customer Data Import Query
Once authenticated, you will need to set a query on the Automatic Customer Data Import for each of the connected Hubs. This is to command the tool to only import data from Salesforce contact records who are available in the AdvocateHub, determined by the populated field under Hub Details component).
- On the Salesforce integration card, click on the Automatic Customer Data Import dropdown
- Here's the format of the query:
Id IN (Select AdvocateHub__Contact__c From AdvocateHub__Hub_Detail__c WHERE AdvocateHub__infl_org_id__c = 'organization hub id') - Replace the 'organization hub id' with your X_ORG_ID from each AdvocateHub's Influitive API (Integrations > Influitive API > Manage > Setup). Please note that each query for each Hub will have different X_ORG_ID.

- Copy-paste the query on the Automatic Customer Data Import field:

- Once pasted, Click Save.
- Switch the Automatic Customer Data Import toggle to ON.
- Repeat this in all the AdvocateHubs that you are connecting to Salesforce.


MultiHub Salesforce Features
Now that you've set this up. Here is more information on how you can utilize the Influitive-Salesforce integration features for your Multiple AdvocateHubs.
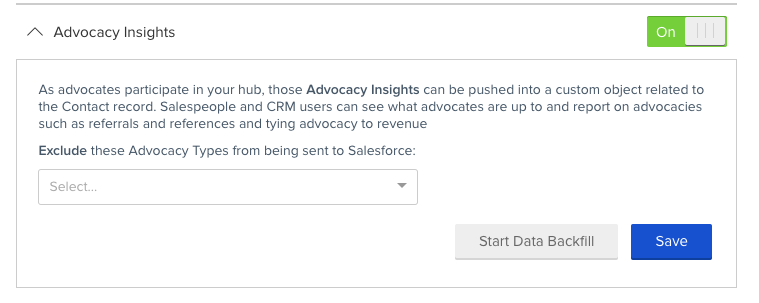
Advocacy Insights
Advocacy Insights is the tool that is responsible in pushing the Acts of Advocacy generated from the Influitie AdvocateHubs that you've connected to your Salesforce instance. More information can be found here: Salesforce: Advocacy Insights.
- Choose the Hubs that you'd like the acts of advocacy to be pushed to Salesforce. You will have turn on the tool in each Hubs in your family.
- Go to your Salesforce Integration (Admin view > Gear icon > Integration > Salesforce > Manage > Settings Tab) and turn the switch ON next to Advocacy Insights.
- Once run, each act of advocacy from each Hub can be differentiated and tagged by the Program name and Hub ID. Here's an example when you check your Contact record.

If you click into one of the Act of Advocacy, you can see more information on this event, like so:


Influitive Hub Details
The Influtiive Hub Details component will list out all the Hub membership details that include the date of when the Hub member was added/created in the Hub (Date created) and date of when the user joined each Hub (Date joined).
Please note that this data does not backfill automatically after you've added the component. Please contact support@influitive.com to request the backfill.
Here's an example of the InflutiveHub Details

Contact Converted / Nominate Contact
This is the Visualforce page that will show you a snapshot of the Hub member's details in the Hub. It includes the user's email, current points, lifetime points, level and who they are nominated by.
The card will be created automatically in the Visualforce page for each Hub the Salesforce's contact record. The card order depends on the Hubs orders that you've added in the Influitive Hub Mapping.
If you're looking to add the Salesforce contact to a specific Hub, you can click on the Nominate Now! Button to add the contact as a Nominee in your AdvocateHub's Invite List. Please make sure you check the Program Hub name on the card to ensure you're adding the contact to the correct Hub.
Here's an example of what the card will look like if the Salesforce contact is only a part of one Hub (Hub 2) and the Nominate button is available to add the user to Hub 1.

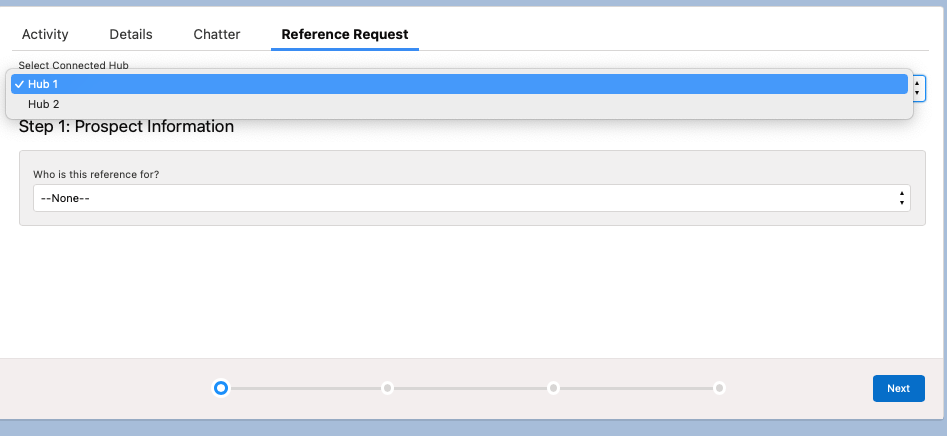
Reference request
Please note that this is a paid feature. Please confirm with your CSM to see if this tool is available in your contract.
In the MultiHub integration, you can choose the Hub that you would like to send the Reference Request challenge to. When you click Submit Request, the challenge will be created in the Hub that you chose.
Here's an example of what it looks like in the Opportunity record: