Salesforce Community Integration
- Feature Overview
- Setup Instructions
- Install the Latest Package Version
- Add Influitive Token
- Add Influitive Hub domain to Remote Site Settings
- Add Influitive Static Assets domain to Remote Site Settings
- Add Influitive’s image CDN as a trusted source
- Add Influitive's Static Assets CDN as a trusted source
- Add Influitive’s hub domain as a trusted source
- Add Influitive URLs as trusted sources
- Add Influitive’s wildcard URL under CORS
- Configuring Components
Overview
The Influitive-Salesforce Community Integration allows you to embed Challenges and other components directly into your Salesforce Community, enabling you to surface advocacy requests, customer engagement campaigns, and other customer marketing programs to your Community Members.
Challenge Carousel
Here is an overview of the Key Features supported in our Challenge Carousel:
- Salesforce Community users will see the Challenges they have available and targeted to them.
- Salesforce Community users who are not members of Influitive will not see the Carousel or any Challenges. Users must have joined / signed up to Influitive to start seeing Challenges.
- The Carousel can be placed anywhere on the page and on any page you'd like.
- You can configure only certain Challenge Types, Channels, or specific Challenges you'd like to appear

Bounties
You can now leverage Influitive points to drive engagement within your Salesforce Community to users who answer questions in the community! Here is an overview of the key features of Bounties:
- Award points to users who's Reply is chosen as the Solution on posts within Salesforce
- Bounties can be made available to Everyone in your community or a subset of only Influitive members based on your Influitive Groups
- If a user completes a bounty who is not a member of Influitive, they will be added to your Invitation list and continue to accrue points. You can choose to formally invite them into Influitive at any time!
- When a user earns a bounty we will send them an email notification letting them know they have earned the bounty.
- Use the Bounties Board component to showcase bounties that are available to users and place it anywhere in your Salesforce Community

Learn more about Bounties Here
Recruitment Component
Here is an overview of the Key Features supported in our Recruitment Component:
- The Component only appears to those who are not members of the Influitive Program
- Easily click the Sign up button which uses a Join Code that the user can use to join the program
- Configure the text and media included in the component to entice new members to join

Setup Instructions
To set up the Influitive Community Integration, you need to ensure Salesforce Community is enabled in your Salesforce Org, then follow the below instructions.
Install the latest package version
- Login to your salesforce.com account as a Salesforce administrator.
- Open a new tab and click on the following link to install the following package:
- Select Install for All Users and click Install or Upgrade
- Make sure in your SFDC Integration in Influitive, you are using the OAuth2 Method under the Setup Tab.
Add Influitive Token
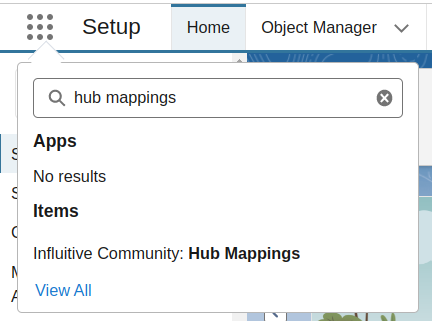
As a Salesforce Admin, search for Influitive Hub Mapping.
- Create a new record of Influitive Hub Mapping Object (Influitive_Hub_Mapping__c). Add your Influitive Subdomain(Influitive_Hub_Domain__c) and Influitive Hub ID(Influitive_Hub_Id__c) of the respective hub (found in Integrations > Influitive API > X_ORG_ID).

Add Influitive Hub domain to Remote Site Settings
- As a Salesforce admin, go to Setup
- Search for “Remote Site Settings” in the “Quick Find” input box
- Click “New Remote Site”
- Under “Remote Site Name”, choose a name such as InfluitiveHub
- Add your Hub domain in the format subdomain.influitive.com under “Remote Site URL”
- Ensure that the “Active” checkbox is checked
- Click Save
- If you are using an Influitive custom domain, repeat these steps to add an additional record but in step 5 use your custom domain as the Remote Site URL

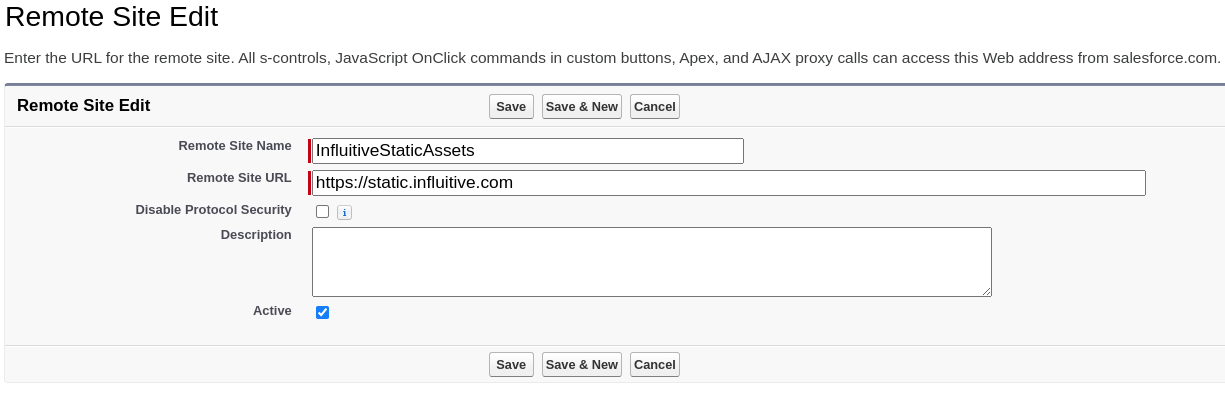
Add Influitive Static Assets domain to Remote Site Settings
- As a Salesforce admin, go to Setup
- Search for “Remote Site Settings” in the “Quick Find” input box
Click “New Remote Site”
- Under “Remote Site Name”, type InfluitiveStaticAssets
- Add static under “Remote Site URL”
- Ensure that the “Active” checkbox is checked
- Click Save
Add Influitive’s image CDN as a trusted source
- As a Salesforce admin, go to Setup
- Search for “CSP Trusted Sites” in the Quick Find input box
- Click “New Trusted Site”
- Under Trusted Site Name, add InfluitiveImageCDN
- Under Trusted Site URL, add https://images.influitive.com
- Ensure that the “Active” checkbox is checked
- Ensure the following CSP Directives are checked:
- Allow site for img-src
- Allow site for media-src
- Allow site for style-src
- Click Save

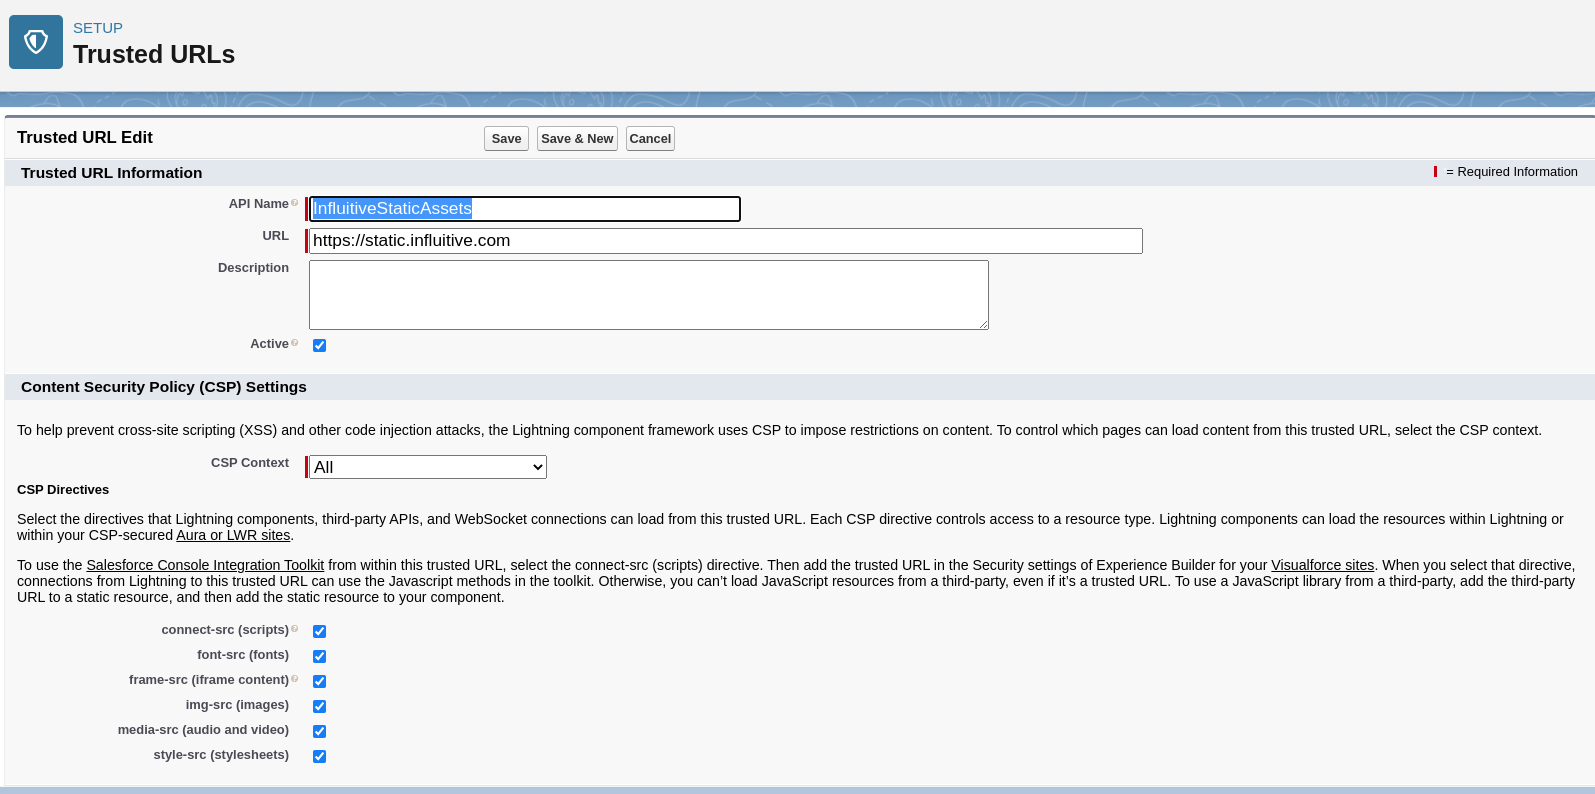
Add Influitive’s static assets CDN as a trusted source
- As a Salesforce admin, go to Setup
- Search for “CSP Trusted Sites” in the Quick Find input box
Click “New Trusted Site”
- Under Trusted Site Name, add InfluitiveImageCDN
- Under Trusted Site URL, add https://static.influitive.com
- Ensure that the “Active” checkbox is checked
- Ensure the following CSP Directives are checked:
- Allow site for img-src
- Allow site for connect-src
- Allow site for frame-src
- Allow site for media-src
- Allow site for style-src
- Click Save.
Add Influitive’s hub domain as a trusted source
- As a Salesforce admin, go to Setup
- Search for “CSP Trusted Sites” in the Quick Find input box
- Click “New Trusted Site”
- Under Trusted Site Name, add InfluitiveHub
- Under Trusted Site URL, add your Hub domain in the format subdomain.influitive.com
- Ensure that the “Active” checkbox is checked
- Ensure the following CSP Directives are checked:
- Allow site for img-src
- Allow site for connect-src
- Allow site for frame-src
- Allow site for media-src
- Allow site for style-src
- Click Save.
- If you are using an Influitive custom domain, repeat these steps to add an additional record but in step 5 use your custom domain as the URL
Add Influitive URLs as trusted sources
- Navigate to Setup > All Sites > Builder
- Click the settings (gear) icon.
- Navigate to the “Security and Privacy” tab
- Under Content Security Policy (CSP), set the Security Level to
- Relaxed CSP: Permit access to inline scripts and Allowed hosts
- Under “Trusted Sites for Scripts”, add the following URLs
- https://static.influitive.com
- Add your Hub domain in the format subdomain.influitive.com
- If you are using an Influitive custom domain, repeat these steps to add an additional record with your custom domain as theURL
- Publish the community site
Add Influitive’s wildcard URL under CORS
- As a Salesforce admin, go to Setup
- Search for “CORS” in the Quick Find input box
- Click “New”
- Under Origin URL Pattern, add “https://*.influitive.com”
Click save.

Configuring Components
Challenge Carousel Component

- To add an Aura component to a community page you must add it from the Experience builder.
- Find the Influitive Challenges Carousel and drag it onto a community page in your preferred location.
- To adjust which Challenges appear in the carousel, reach out to the support team
After completing these steps you should see the carousel component appear and start to show challenges. If you are not seeing the carousel, the first step is to ensure the user you are logged in as in Salesforce exists in Influitive as either an Administrator or Member and that you have challenges available to you. If you are still having issues seeing Challenges contact support@influitive.com.
Recruitment Component
- To add an Aura component to a community page you must add it from the Experience builder.
- Find the Recruitment Component and drag it onto a community page in your preferred location
- You can adjust the settings of the component by clicking it. Here you can adjust the Title, Text, Image, and button text of the component. The sign-up link should either be a join-code specifically created for Salesforce Communities in your Hub, or a link to your Influitive Sign up page if you have an Open Sign up setup.

Because the Recruitment Component only appears to users who do not exist in Influitive, you will need to ensure the user you are logged in as in Salesforce does not exist in Influitive to see and test it.
Bounties Components
There are two bounties components to install
- Bounty Post Component: This shows up on individual posts, letting users see if there is a bounty available. To install, search for the "Question Detail" Page in your Experience Builder, then drag this Component onto the page. We recommend placing this in the Content area, just above the Feed Post and Comments component. You can use the component options to configure the background colour and points colour used in this component
- Bounty List Component: This shows a list of all bounties available for the current user, ideally placed in a landing or home page of your community. To install, find the page you'd like to add it to in your Experience Builder, then drag this component onto the page.
Give members the appropriate permission to see Components
With the install of our Community Package a Salesforce Flow has been included that will grant members permissions to see Influitive components. Even though this permission is set for all users, each component has its own visibility settings depending on whether the user is a member of Influitive or not.
Enable the Flow for New Users
- Search "Flows" in the quick find box in the settings. Click on the Flows option under Process Automation. You can see the "Influitive_Communities Assign Permission Set To New User" flow under the "ALL Flows".
- Open "Influitive_Communities Assign Permission Set To New User" and click on the Activate button.
Assign the Permission to Existing Users
This flow will only work on the creation of new members. For existing members we need to manually assign the "Influitive Communities" permission set for them to see the Carousel.
- Go to Settings and search for "Permission set" in the Quick Find Box.
- Click on "Influitive Communities" permission set from the list.
- Click on "Manage Assignment" Tab.
- Click on "Add Assignment" Button".
- Check the users you want to assign the above permission set, then click the Next button and then Assign button.
In order to begin seeing Bounties, you must go to your Influitive Hub and create a bounty under the Program > Bounties tab. Ensure this bounty is targeted to your user so you can test that the bounty components are showing up correctly.
Removing Older Components
In updated to our App Exchange Package, we may have to create new versions of components when making changes. To remove old components, make sure they are removed from any community pages and replaced with the new components. Then:
- Navigate to Setup > Lightning Components
- Locate the component by searching for Influitive related components
- There will be an icon next to the component indicating that is is no longer part of the managed package by the “Managed - Install Deleted” icon
- Make sure this component has been removed from all community sites
- Click “Del”